


Welcome Again, I know it has been nearly a week I have published a Blog on this topic, but yeah life happens.
Today, we are going to look on how my thought process went in my mind to build this Password Generator App.
Let's first create a feel. You will make a desing similiar to what I have built.
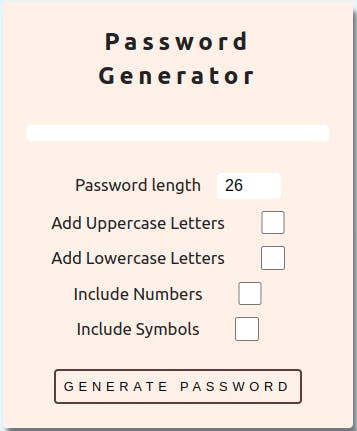
There is a space to show the password, including all the conditions to be set to create password before generating it.
We create JSX and apply CSS accordingly
(I will not show that as we will focus more on Thought Process used while Making the App).
We then create States in which we will store info i.e 'true' or 'false'.
Each of the Checkboxes will have one State. When it is Selected, the state will turn true or vice versa.
Now you have some sort of signal to the react codebase that something happens when you click the checkbox.
Similarly it is also done for the 'Password Length' as well.
Now let's focus on the part where the 'Generated Password' will be displayed.
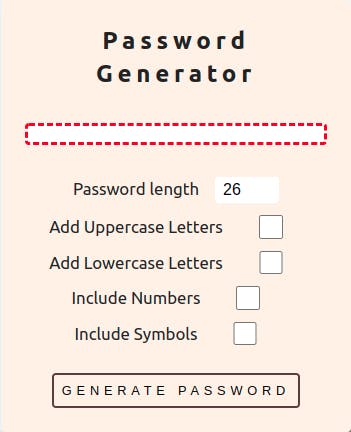
Yeah the one marked with Red
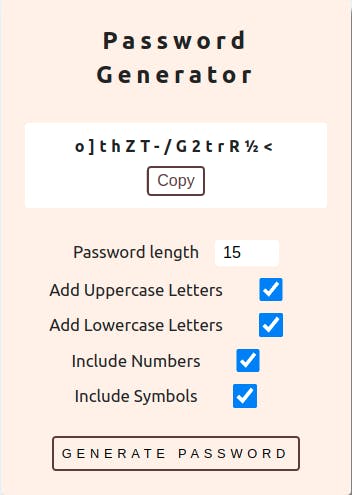
There, when the boxes and password length are selected and then submitted, a password is generated and it will look something like this
And when Clicked on 'Copy' Button, it will show something like this
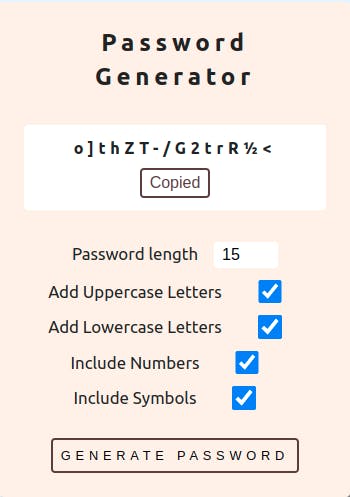
Isn't it Good? This is what I thought and made it happen.
First you have to see that there is a change of state here. Only when the form is submitted, it is displayed. So why not just make sure that when the Generate Password Button is clicked a state change happens and with that state change we display that 'JSX'. The state change is the password state that is changed.
const [password, setPassword] = useState("");
Yeah, password state gets changed when the form is submitted (We will look the process behind it later, like how the password is generated and all etc).
Now when the password state is filled with The 'Password', the JSX is displayed:
<div className="passwordContainer">
 <h4 className="the-password">{password}</h4>
  {password && (
    <button className="btn-copy" onClick={() => handleCopy()}>
     {copiedToClipboard ? `Copied` : ` Copy`}
    </button>
   )}
</div>
And as shown, when the 'Copy' button is clicked after it is displayed, a function is triggered prompting it to copy the password state value to clipBoard and changing the state copiedToClipboard to 'true', thus changing the value of Button 'Copy' to 'Copied'
  const handleCopy = () => {
    setCopiedToClipboard(true);
    navigator.clipboard.writeText(password);
  };
Remember that this process is going to happen only when a the form is submitted. So let's focus on that. (Don't Worry, This one's easy)
After Selecting the neccessary criteria for password, the states are changed accordingly in which the criteria selected is associated with state i.e true.
        <form className="form">
          <div className="form-group">
            <label htmlFor="password-strength">Password length</label>
            <input
              className="pw"
              type="number"
              id="password-stregth"
              name="password-strength"
              max="26"
              min="8"
              // the value is selected and then stored in
              // passwordLength state
              onChange={(e) => setPasswordLength(e.target.value)}
              // the value is then displayed here again making
              // it controlled input
              value={passwordLength}
            />
          </div>
          <div className="form-group">
            <label htmlFor="uppercase-letters">Add Uppercase Letters
            </label>
            <input
              type="checkbox"
              id="uppercase-letters"
              name="uppercase-letters"
              // the checkbox when checked gives the state
              // includeUpperCase to true
              onChange={(e) => setIncludeUpperCase(e.target.checked)}
              // controlled input
              checked={includeUpperCase}
            />
          </div>
          <div className="form-group">
            <label htmlFor="lowercase-letters">Add Lowercase Letters
            </label>
            <input
              type="checkbox"
              id="lowercase-letters"
              name="lowercase-letters"
              // the checkbox when checked gives the state
              // includeUpperCase to true
              onChange={(e) => setIncludeLowerCase(e.target.checked)}
              // controlled input
              checked={includeLowerCase}
            />
          </div>
          <div className="form-group">
            <label htmlFor="include-numbers">Include Numbers</label>
            <input
              type="checkbox"
              id="include-numbers"
              name="include-numbers"
              // the checkbox when checked gives the state
              // includeUpperCase to true
              onChange={(e) => setIncludeNumbers(e.target.checked)}
              // controlled input
              checked={includeNumbers}
            />
          </div>
          <div className="form-group">
            <label htmlFor="include-symbols">Include Symbols</label>
            <input
              type="checkbox"
              id="include-symbols"
              name="include-symbols"
              // the checkbox when checked gives the state
              // includeUpperCase to true
              onChange={(e) => setIncludeSymbols(e.target.checked)}
              // controlled input
              checked={includeSymbols}
            />
          </div>
          {/* finally it is submitted and a function is triggered.
          We will see what happens here */}
          <button className="btn" onClick={handlePassword}>
            Generate Password
          </button>
        </form>**
So in function handlePassword,
  const handlePassword = (e) => {
    // when this is triggered, by default it refreshes the page
    // but we prevent it by writing the below method of event
    e.preventDefault();
    // Rememeber?, this is the state which make the button
    // "Copied" to "Copy" and that's what we do for each time
    // the form is submitted
    setCopiedToClipboard(false);
    if (
      !includeUpperCase &&
      !includeLowerCase &&
      !includeNumbers &&
      !includeSymbols
    ) {
      // this condition runs when no password criteria is provided
      alert("You Must Atleast Select One Checkbox!!");
    } else {
      // variable is created
      let charList = "";
      // a/q to the criteria set, the values are added in it
      if (includeNumbers) {
        charList += numbers;
      }
      if (includeUpperCase) {
        charList += upperCaseLetters;
      }
      if (includeLowerCase) {
        charList += lowerCaseLetters;
      }
      if (includeSymbols) {
        charList += specialCharacters;
      }
      // and then we randomly select character in charList
      // until the length of password is reached.
      // only then the 'password' state is set
      // thus displaying it accordingly
      setPassword(createPassword(charList));
    }
  };
So before setting 'setPassword' state, we have to create password accordingly
  const createPassword = (charList) => {
    // This is how the password is set
    // first we create a variable
    let password = "";
    // we run the loop till the length of the password
    // and randomly in each count take out the char from the
    // variable created before and place it in 'password
    // variable, finally we return it
    for (let i = 0; i < passwordLength; i++) {
      const randomIndex = Math.round(Math.random() * charList.length);
      password += charList.charAt(randomIndex);
    }
    return password;
  };
And thus this is how we create an app and it's thought process around it.
Let's Revise, We create design first and each criteria is assigned a state. With each criteria update, the respective state updates and then this info is used while submitting the form where the values are added to a variable a/q to the criteria/state selected and then before publishing the password by changing the display state, we pass it via function which uses that variable created a/q to criterion to take out random values out of it and then place it in a variable till the decided length and then finally returned thus displaying password.
Finally, as the password state updates, password with the 'Copy' button is also displayed, and then when clicked, a function is triggered which copies that password to clipboard, along with a state updates which changes the value of 'Copy' to 'Copied'.
So, how was it?. Hope it was not too complex. I tried to explain in a manner where I was thinking to create it again if I would do it again.
Thank You, If you enjoyed it then please like, share, follow and if you didn't, I will be happy to look at your constructive criticism.